Packing a kitchen is one of the most challenging parts of relocation. From fragile glassware to heavy appliances, every item needs careful handling. If you want to Pack Kitchen Items for a Move efficiently in Canada, planning and proper materials make a big difference. This guide explains the full process in clear steps, with practical examples and professional techniques used by experienced movers.
Whether you are moving across Toronto, Calgary, Vancouver, or to another province, these strategies help protect your belongings and reduce stress on moving day.

Why the Kitchen Is the Hardest Room to Pack
The kitchen contains a wide range of materials such as glass, ceramic, metal, plastic, and electronics. It also includes irregular shapes like wine glasses, sharp knives, and bulky appliances. Unlike a bedroom where most items are soft, kitchen packing requires extra protection and smart box organization.
When you Pack Kitchen Items for a Move, you must focus on:
- Fragile dishware
- Heavy cookware
- Perishable food
- Electrical appliances
- Hazardous cleaning supplies
Each category requires a different packing method.
Essential Packing Supplies
Before starting, gather professional grade materials. Using proper supplies reduces damage risk during transportation across Canadian cities.
| Packing Supply | Purpose | Why It Matters |
|---|---|---|
| Sturdy moving boxes | For dishes, pantry items, appliances | Prevent box collapse |
| Dish pack boxes | Extra reinforced for fragile items | Ideal for plates and glassware |
| Packing paper | Wrapping breakables | Safer than newspaper |
| Bubble wrap | Extra cushioning | Protects delicate items |
| Packing tape | Sealing boxes securely | Keeps items stable |
| Permanent marker | Labeling boxes | Helps during unloading |
| Box dividers | Separating glasses | Reduces shifting |
High quality supplies are especially important for long-distance moves in Canada, where road vibration can cause internal damage.
Step 1: Declutter Before You Start
Before you Pack Kitchen Items for a Move, reduce what you do not need.
Check expiry dates in the pantry. Donate unopened non perishable food. Dispose of broken utensils. If an appliance has not been used in a year, reconsider moving it.
Example: If you have five frying pans but regularly use only two, pack the best ones and donate the rest. Fewer items mean fewer boxes and lower moving costs.
Step 2: Sort by Category
Organize items into groups:
- Plates and bowls
- Glassware
- Cutlery
- Pots and pans
- Small appliances
- Pantry goods
- Cleaning products
Sorting simplifies packing and labeling. It also makes unpacking easier in your new Canadian home.
Step 3: Pack Plates and Bowls Properly
Plates are fragile but easy to protect when packed vertically.
- Wrap each plate individually with packing paper.
- Stack them vertically inside a dish pack box.
- Add padding at the bottom and top of the box.
- Fill empty spaces to prevent movement.
Example: Place a layer of crumpled paper at the bottom, line plates vertically like records, then fill side gaps with soft paper.
Label the box as Fragile Kitchen Dishes.
Step 4: Protect Glassware and Mugs
Glassware needs individual attention.
- Wrap each glass with packing paper.
- Insert paper inside hollow parts for extra support.
- Use dividers to separate wine glasses.
- Place heavier glasses at the bottom and lighter ones on top.
Never stack glasses directly on top of each other without padding. When you Pack Kitchen Items for a Move, stability inside the box matters more than the box siz.
Step 5: Secure Pots, Pans, and Cookware
Pots and pans are durable but heavy.
- Stack similar sizes together.
- Place paper between non stick surfaces to avoid scratches.
- Wrap lids separately and stand them vertically.
Heavy cookware should go into small boxes to prevent lifting injuries. Overloaded boxes often tear during transport.
Step 6: Pack Small Appliances Safely
Kitchen appliances such as microwaves, blenders, and coffee machines require extra care.
If possible, use the original box. If not:
- Wrap the appliance in bubble wrap.
- Secure loose cords.
- Fill empty box space with padding.
Example: For a stand mixer, remove attachments, wrap them separately, and secure the bowl inside the base with padding.
Step 7: Handle Pantry Items Correctly
When planning to Pack Kitchen Items for a Move, food management is essential.
- Avoid moving open containers.
- Seal spices in zip bags.
- Use small boxes for canned goods.
- Place heavier items at the bottom.
For long distance moves within Canada, consider transporting perishables in a cooler or consuming them before moving day.
Step 8: Manage Knives and Sharp Objects
Safety is critical.
- Wrap knives individually in thick paper.
- Secure them with tape.
- Bundle them together and label clearly.
Never leave sharp objects loose in a box.
Step 9: Prepare Large Appliances
Large appliances such as refrigerators and ovens require preparation.
- Defrost the fridge at least 24 hours before moving.
- Clean and dry thoroughly.
- Secure doors with stretch wrap.
Professional movers in Canada often recommend disconnecting appliances in advance to avoid delays.
Step 10: Label Clearly and Strategically
Proper labeling reduces confusion.
Write on each box:
- Kitchen
- Fragile if applicable
- Room destination
Color coded labels help if you are moving into a multi level house or condo.
Example Scenario
Imagine moving from Ottawa to Vancouver. The trip involves thousands of kilometers. If dishes are stacked flat instead of vertical, road vibration may crack them. If pantry boxes are overloaded, bottoms may collapse during loading.
However, if you follow structured steps to Pack Kitchen Items for a Move, each box remains balanced, protected, and easy to unload.
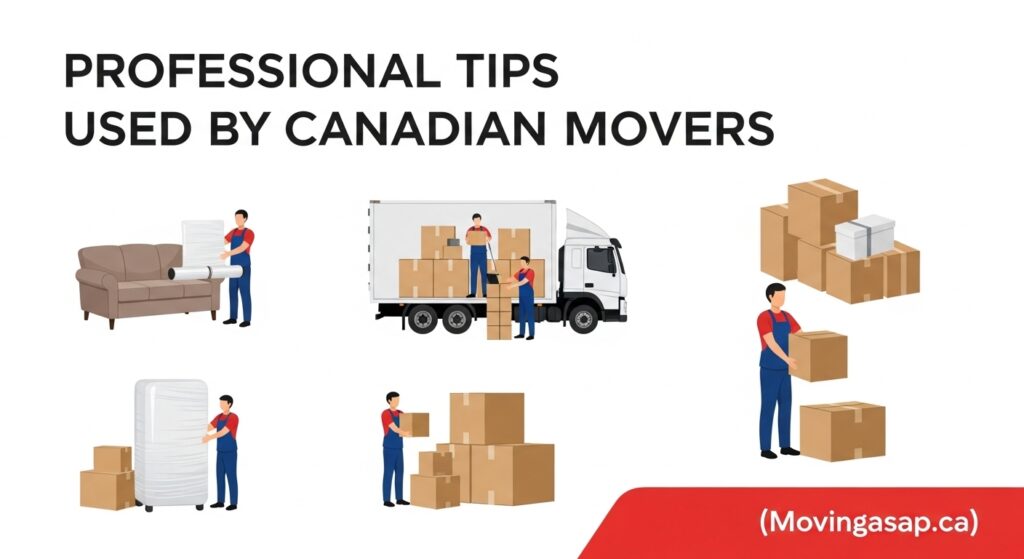
Professional Tips Used by Canadian Movers
- Pack heavy items in small boxes.
- Fill every empty gap inside boxes.
- Avoid mixing cleaning chemicals with food items.
- Keep an essentials box with plates, cutlery, and a kettle for the first day.
This essentials box prevents unnecessary unpacking stress after arrival.
Common Mistakes to Avoid
- Using grocery store boxes that lack strength
- Skipping padding between fragile items
- Forgetting to label boxes
- Overpacking heavy cookware
- Moving expired food unnecessarily
When you Pack Kitchen Items for a Move properly, you reduce the risk of breakage and save money on replacements.
Quick Packing Checklist
| Task | Completed |
|---|---|
| Decluttered pantry | Yes or No |
| Wrapped fragile items individually | Yes or No |
| Secured sharp objects | Yes or No |
| Sealed boxes tightly | Yes or No |
| Labeled each box clearly | Yes or No |
Frequently Asked Questions
How long does it take to pack a kitchen for a move in Canada?
For an average household, it takes one full day if done carefully. Larger homes may require two days.
Should food be moved during winter moves in Canada?
Non perishable food can be moved safely. However, liquids may freeze in extreme temperatures. Plan accordingly.
What is the safest way to pack glassware?
Wrap each piece individually, use dividers, and fill empty spaces inside the box to prevent movement.
Can appliances be packed without original boxes?
Yes. Use sturdy moving boxes, bubble wrap, and proper padding to secure the appliance firmly.
Is professional packing worth it?
For large kitchens or long distance moves across provinces, professional packing reduces risk and saves time.
Final Thoughts
To Pack Kitchen Items for a Move successfully in Canada, focus on preparation, protection, and organization. Each item requires specific care, from delicate wine glasses to heavy cookware. Using high quality supplies, following structured steps, and labeling clearly will make unpacking smooth and stress free.
A well packed kitchen ensures that when you arrive at your new home, you can quickly set up your space and return to normal routines without unnecessary damage or delay. Proper planning always leads to a safer and more efficient relocation experience.
Contact Us: +6475401453 | info@movingasap.ca
